Those of you familiar with my graphic novel Family Man will know that I have spent many, many hours drawing people wearing tricorn hats. It was a style of headgear that stuck around for quite some time, and it seems to be the first shaped hat designed expressly for the purpose of driving artists crazy. (Later fashion provided us with the fedora and the cowboy hat, in which crucibles many a cartoonist has died screaming.)
I know that you don’t want to be that person who gives up and just draws a vague lump on your character’s head. I can’t help you with the fedora or cowboy hat – but I’m here to lend you a hand with our friend the Tricorn.
There’s one very obvious solution for how to go about properly drawing a tricorn at any angle: buy an expensive reproduction hat online and pose or photograph it as necessary. However, that will net you many hours of digging through endless Halloween store shopping results for shapeless faux-leather “Jack Sparrow” pirate hats and weird little woolen cereal bowls with a weak brim claiming to be “Colonial hats”. When finally you get to plonk down $400 on an accurate drawing prop, you’ll probably want to do violence to your fellow human beings.
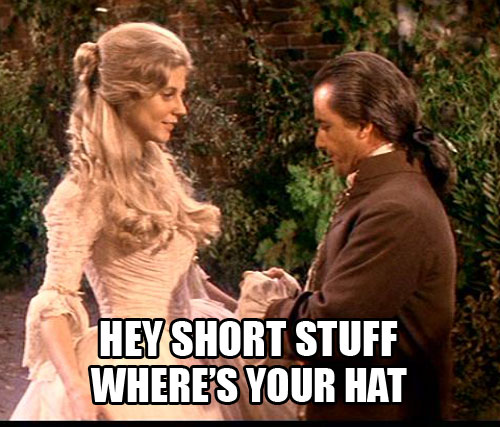
The next most obvious solution, if you’re broke or slightly insane, is to hunt down vast numbers of screen captures from appropriate period films. I will cop to having, on hand, roughly a gigabyte of stills from 1776: The Musical: The Movie. I will not claim that these have been unhelpful, but perhaps you aren’t interested in paging through 53 blurry images of Blythe Danner in a corset in hopes of locating that one angle of a guy in a hat.
It’s also wise to keep in mind that any period film is ALSO filtered through the period when it was filmed – hence, in 1776 we learn that Thomas Jefferson really liked 70’s style brushed-up temples.
So if you are looking for the simplest, cheapest, most rudimentary tricorner hat hack: get ready. This will provide you with the basic folded planes of the tricorn hat so that you can sketch out the essential shape; you’re on your own for deciding the style of the crown and providing the subtler details of material and curved blocking.
Those of you who have celebrated Purim by eating hamantaschen cookies will recognize this procedure.
YOU WILL NEED: a piece of foldable paper, a pair of scissors, a pencil.
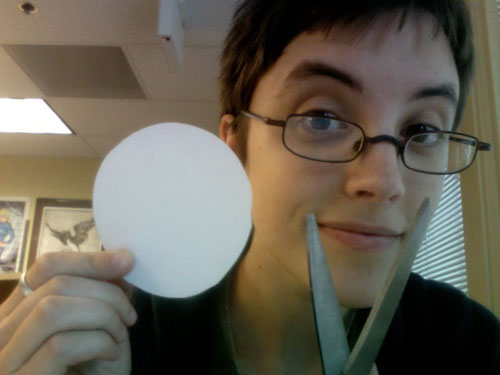
STEP ONE.
Cut out a circle of paper. Cut it to whatever size you like; don’t worry about the shape being perfect. (a slightly oblong shape might actually get you more accurate results later on.)
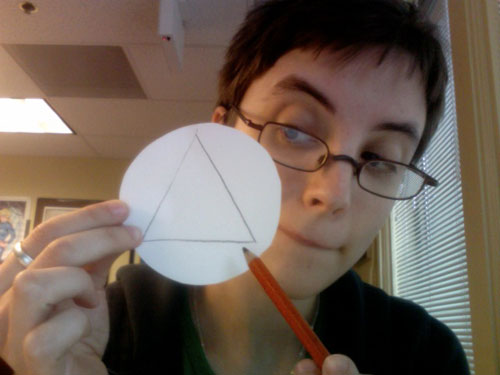
STEP TWO.
Draw an equilateral (equal-sided) triangle inside the circle so that each point touches the edge. Again, don’t worry too much about deadly accuracy; these are just folding guidelines.
STEP THREE.
Pinch in the paper at each point. I find it’s easiest to first pinch up two points, then move on to the third.
STEP FOUR.
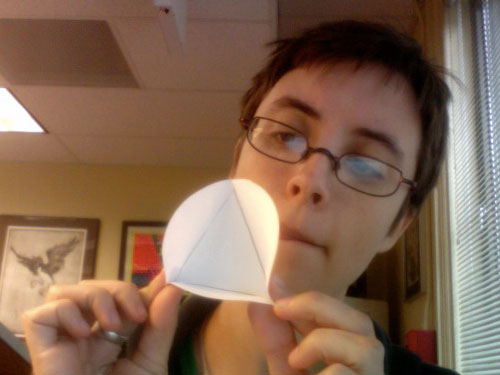
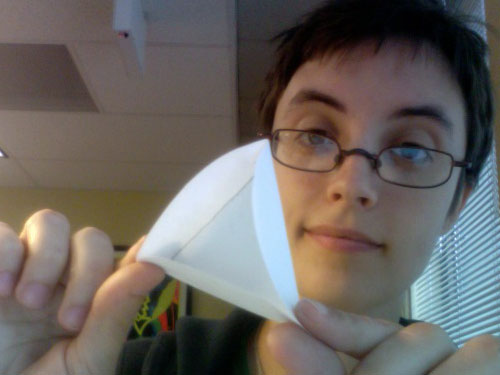
Now that the points are pinched up, it should be easy for you to fold the paper along the pencil lines. The triangle is still flat, but the extra half-circles of paper stick up.
STEP FIVE.
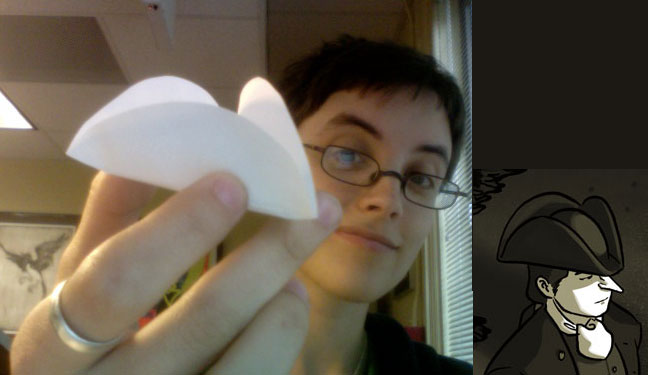
Behold! Whichever corner sticks forward the most is now the front brim of the hat; the other two form the back. The triangle is the underside of the hat, where your person would normally stick their head in. You can arrange this little paper thingie at many common angles and immediately figure out the basic arrangement of the hat’s trickiest parts. You can see that the angle I held the model at roughly replicates Luther’s hat down in the inset image.
If you want to replicate the crown of the hat, make this model big enough to accommodate half of a ping-pong ball (for a round crown) or a bottle cap (flat crown), and glue or tape it on.
In actual hats, the “corners” were often not tightly pinched together, especially in the front, so if you want to replicate that look, let the tips of the triangle run off the paper, skip the pinching, and just fold up along the lines.
Now that you have this model, I recommend you go back and look at those screencaps, or at any trustworthy reference source, to fill yourself in on style and material details/divergences. These hats were made of anything from light felt to heavy leather, decorated with ostrich feathers and gilt, tied down, worn askew, blocked so that they sat more on the back of the head than the front, etc, and came in every size from bitsy to engulfing.
Regardless, this little model will help you draw a tricky angle when your reference sources aren’t working out.
Enjoy the increased ease of drawing one of history’s most frustrating hats!
____
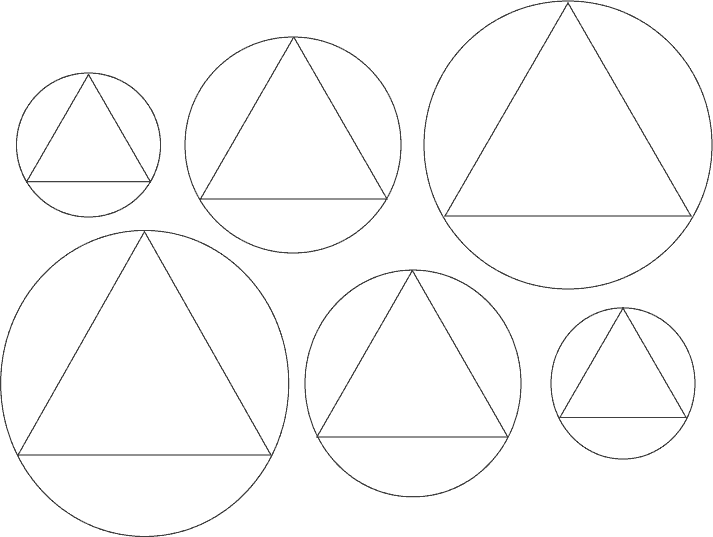
ADDENDUM: lovely reader Jenn S. made up a nice little cheater template for those of you who don’t want to draw your own circles and triangles! Click to view and download at full size, then print and use at will. Thanks, Jenn!
Matt
August 18 2010 / 10:37 am
Neat!
And no doubt exceedingly useful.
Though I confess, I was hoping for a wearable paper hat.
Because that would be awesome.